

As a trusted supplier of water cooled chillers, I understand the importance of maintaining the proper refrigerant level in these systems. A water cooled chiller is a crucial component in many industrial and commercial settings, providing efficient cooling for various processes. In this blog post, I will share with you the steps and methods to check the refrigerant level in a water cooled chiller.
Why is Checking Refrigerant Level Important?
The refrigerant is the lifeblood of a water cooled chiller. It absorbs heat from the process water and transfers it to the cooling water. If the refrigerant level is too low, the chiller will not be able to cool effectively, leading to reduced efficiency, increased energy consumption, and potential damage to the compressor. On the other hand, an overcharged refrigerant system can also cause problems such as high pressure, excessive heat rejection, and compressor failure. Therefore, regularly checking the refrigerant level is essential to ensure the optimal performance and longevity of the chiller.
Tools and Equipment Needed
Before you start checking the refrigerant level, you will need the following tools and equipment:
- Refrigerant gauges: These are used to measure the pressure of the refrigerant in the system. There are two types of gauges: the low-pressure gauge and the high-pressure gauge.
- Thermometer: This is used to measure the temperature of the refrigerant and the cooling water.
- Scale: This is used to weigh the refrigerant cylinders to determine the amount of refrigerant added or removed from the system.
- Leak detector: This is used to check for refrigerant leaks in the system.
Step-by-Step Guide to Checking Refrigerant Level
Step 1: Safety First
Before you start working on the chiller, make sure you take all the necessary safety precautions. Wear appropriate personal protective equipment (PPE), such as gloves and safety glasses. Turn off the power to the chiller and allow it to cool down before you start working on it.
Step 2: Locate the Service Ports
The service ports are located on the refrigerant lines of the chiller. They are usually marked with a label indicating the low-pressure and high-pressure sides of the system. Use a refrigerant gauge set to connect to the service ports.
Step 3: Measure the Pressure
Once the gauges are connected to the service ports, turn on the chiller and allow it to run for a few minutes to stabilize the pressure. Read the pressure values on the gauges. The low-pressure gauge should read between 30 and 60 psi, while the high-pressure gauge should read between 150 and 300 psi. These values may vary depending on the type and size of the chiller.
Step 4: Measure the Temperature
Use a thermometer to measure the temperature of the refrigerant at the evaporator and the condenser. The temperature difference between the evaporator and the condenser should be between 10 and 20 degrees Fahrenheit. If the temperature difference is too small, it may indicate a low refrigerant level.
Step 5: Calculate the Superheat and Subcooling
Superheat is the difference between the actual temperature of the refrigerant vapor at the evaporator outlet and the saturation temperature of the refrigerant at the same pressure. Subcooling is the difference between the actual temperature of the refrigerant liquid at the condenser outlet and the saturation temperature of the refrigerant at the same pressure. These values can be calculated using the pressure and temperature readings obtained in steps 3 and 4.
The ideal superheat value for a water cooled chiller is between 10 and 15 degrees Fahrenheit, while the ideal subcooling value is between 5 and 10 degrees Fahrenheit. If the superheat value is too high, it may indicate a low refrigerant level, while a low subcooling value may indicate an overcharged system.

Step 6: Check for Leaks
Use a leak detector to check for refrigerant leaks in the system. Look for signs of refrigerant leaks, such as oil stains or hissing sounds. If you detect a leak, repair it immediately to prevent further loss of refrigerant.
Step 7: Add or Remove Refrigerant
If the refrigerant level is too low, you will need to add refrigerant to the system. Use a refrigerant scale to weigh the refrigerant cylinders and add the appropriate amount of refrigerant to the system. Make sure you follow the manufacturer's instructions when adding refrigerant.
If the refrigerant level is too high, you will need to remove refrigerant from the system. This can be done by using a refrigerant recovery machine. Again, make sure you follow the manufacturer's instructions when removing refrigerant.
Conclusion
Checking the refrigerant level in a water cooled chiller is an important maintenance task that should be performed regularly to ensure the optimal performance and longevity of the system. By following the steps outlined in this blog post, you can easily check the refrigerant level in your chiller and take the necessary steps to maintain it at the proper level.
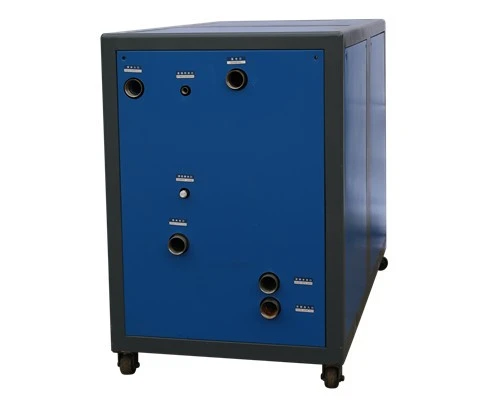
If you are in the market for a new water cooled chiller, we offer a wide range of high-quality Water Cooled Scroll Chiller and Industrial Water Chiller systems. Our Water Cooled Chiller System is designed to provide efficient and reliable cooling for various industrial and commercial applications. Contact us today to learn more about our products and how we can help you meet your cooling needs.
References
- ASHRAE Handbook of Refrigeration
- Manufacturer's manuals for water cooled chillers